# HTTP Client Tutorial
Integrator section
This tutorial covers the retrieval of integration and installation IDs, and the creation of an access key. You may want to read the Integrator section before you begin.
# 1 Download Insomnia
Insomnia is a free HTTP client that we will use in this short tutorial to demonstrate interactions with the Vision Web API. Download Insomnia (opens new window)
# 1 Download our test Integrator environment
We have made your life easier! Here is a link to a JSON file that you can import into Insomnia and get a ready-to-use integrator environment.
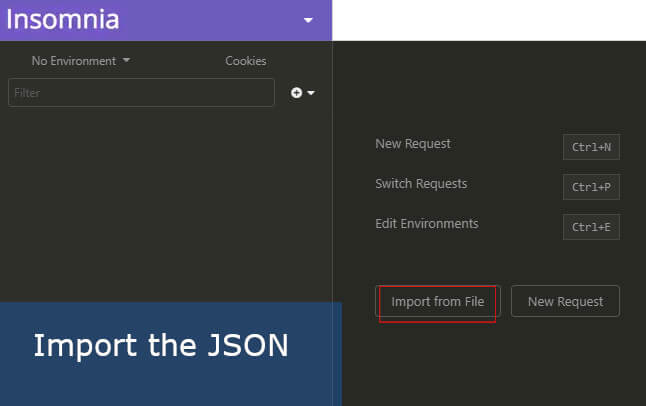
Upon installation, you should see the screen below allowing to import. If not, just create a new environment and select "Import/Export" from the top left purple menu, then browse for the downloaded file.
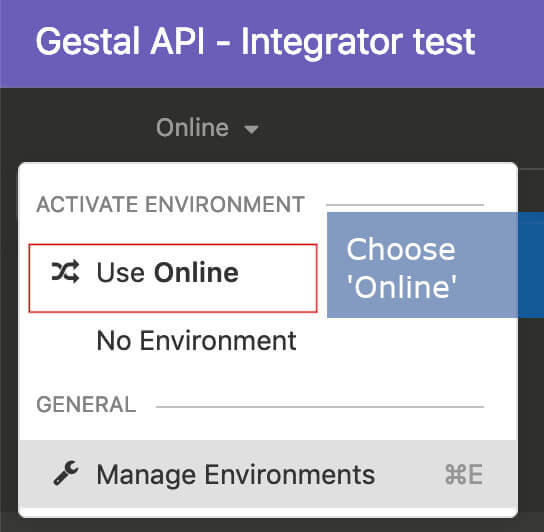
# 3 Select the 'Online' environment
Insomnia lets you simulate environments for testing purposes. We will use the existing "Online" one as we will interact directly with the live API.
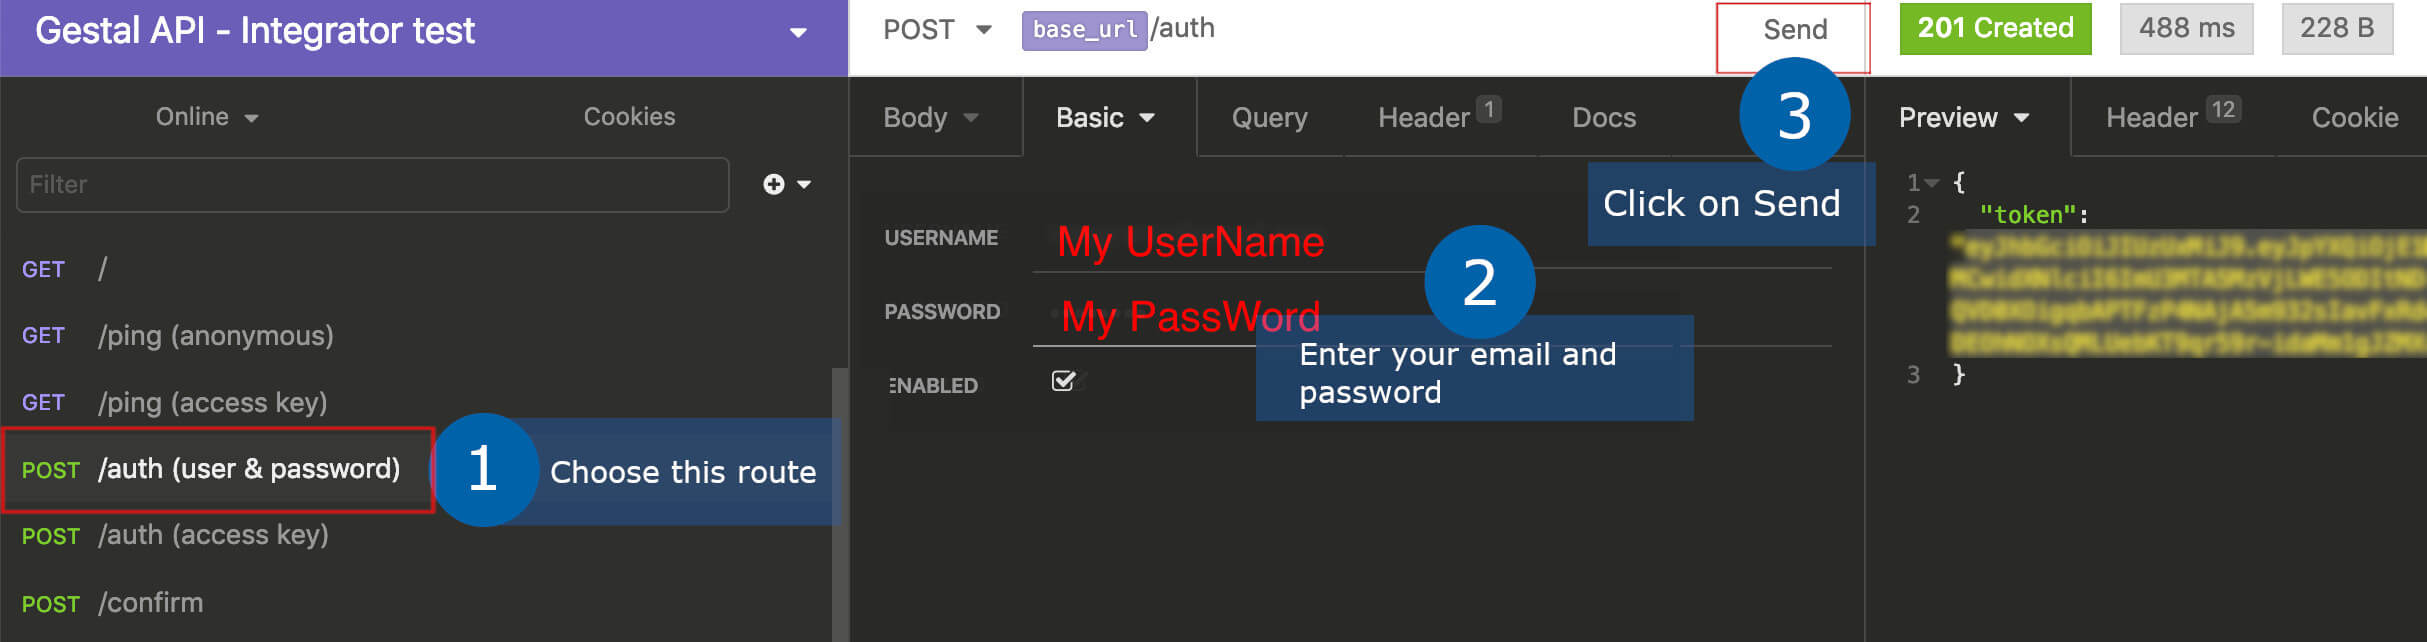
# 4 Authenticate
From the left menu, click on the "POST /auth (user & password)" route, enter your credentials and click send.
A session token will be returned and will be stored in the token variable.
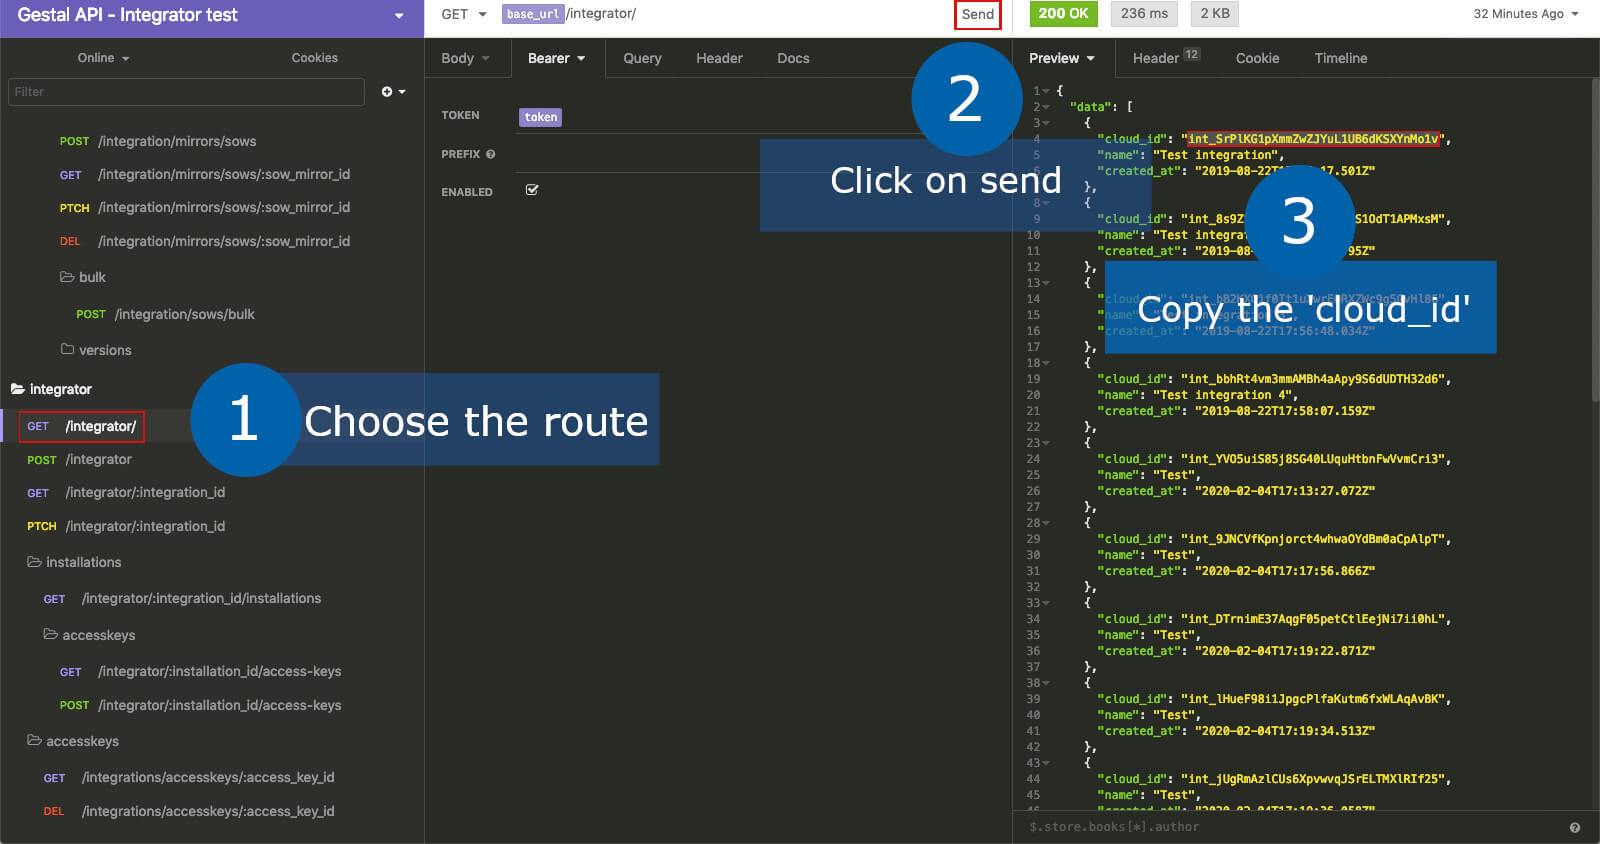
# 5 Retrieve integrations
Click on the "GET /integrator" route under the integrator folder, and click send. A list of existing
integrations will be returned.
Copy the cloud_id of one of the installations to set it as an environment variable on next step.
# 6 Save as environment variable
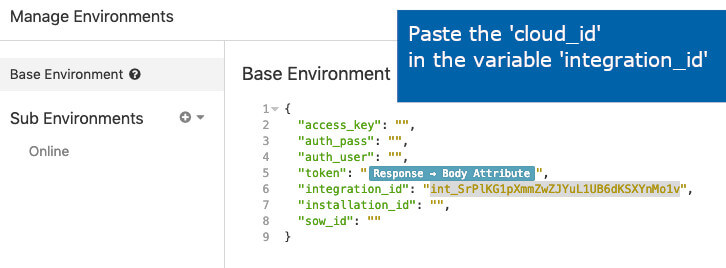
Press CTRL + E or CMD + E on Mac to open the environment management.
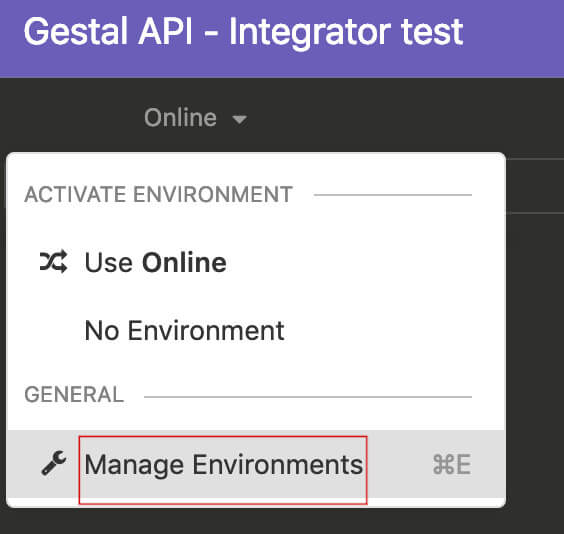
Click on "Base environment", then paste the cloud_id into the integration_id variable. It will then be possible to use it in multiple routes.
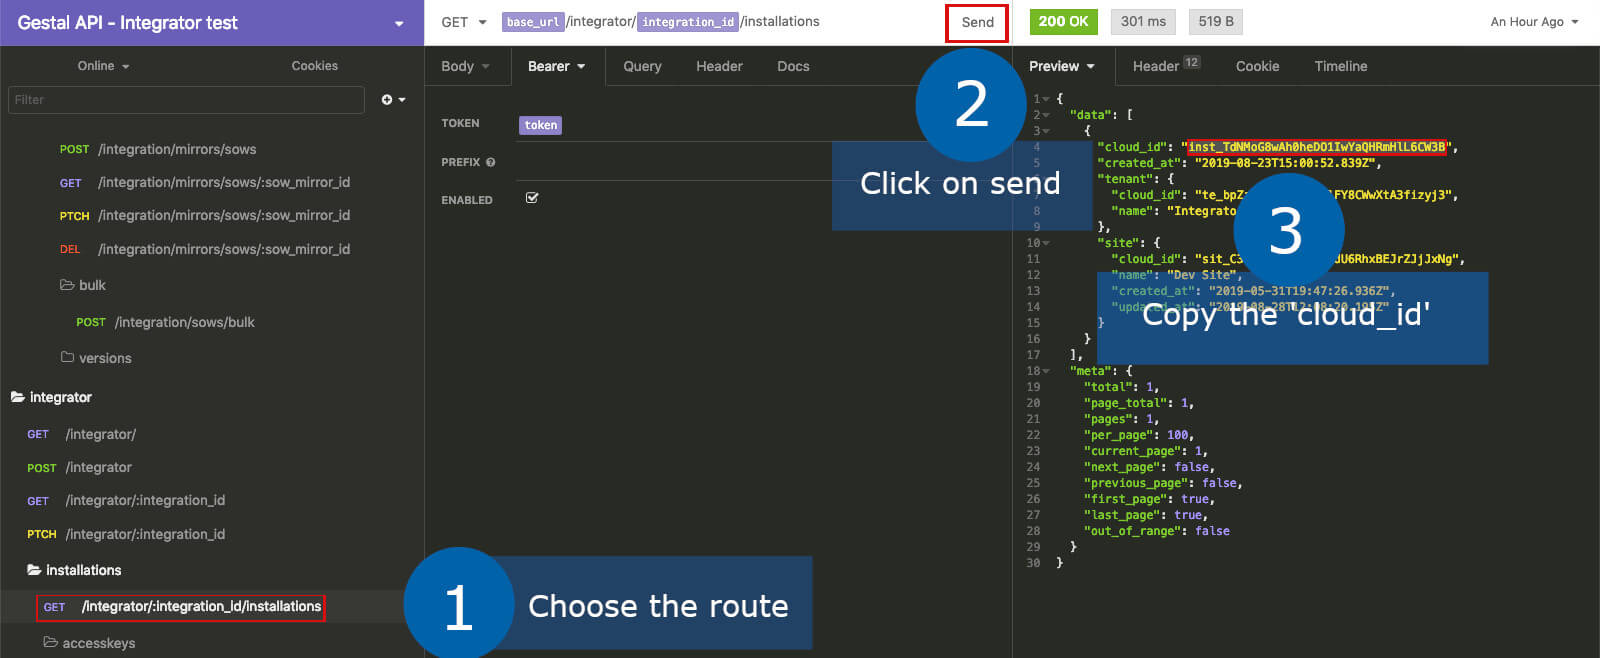
# 7 Get an installation_id
Now click on the "GET /integrator/:integration_id/installations" route, which will now use the integration_id
variable in its URL, and click send. A list of installations will be returned.
Copy the cloud_id of an installation, only this time
save it as the installation_id variable.
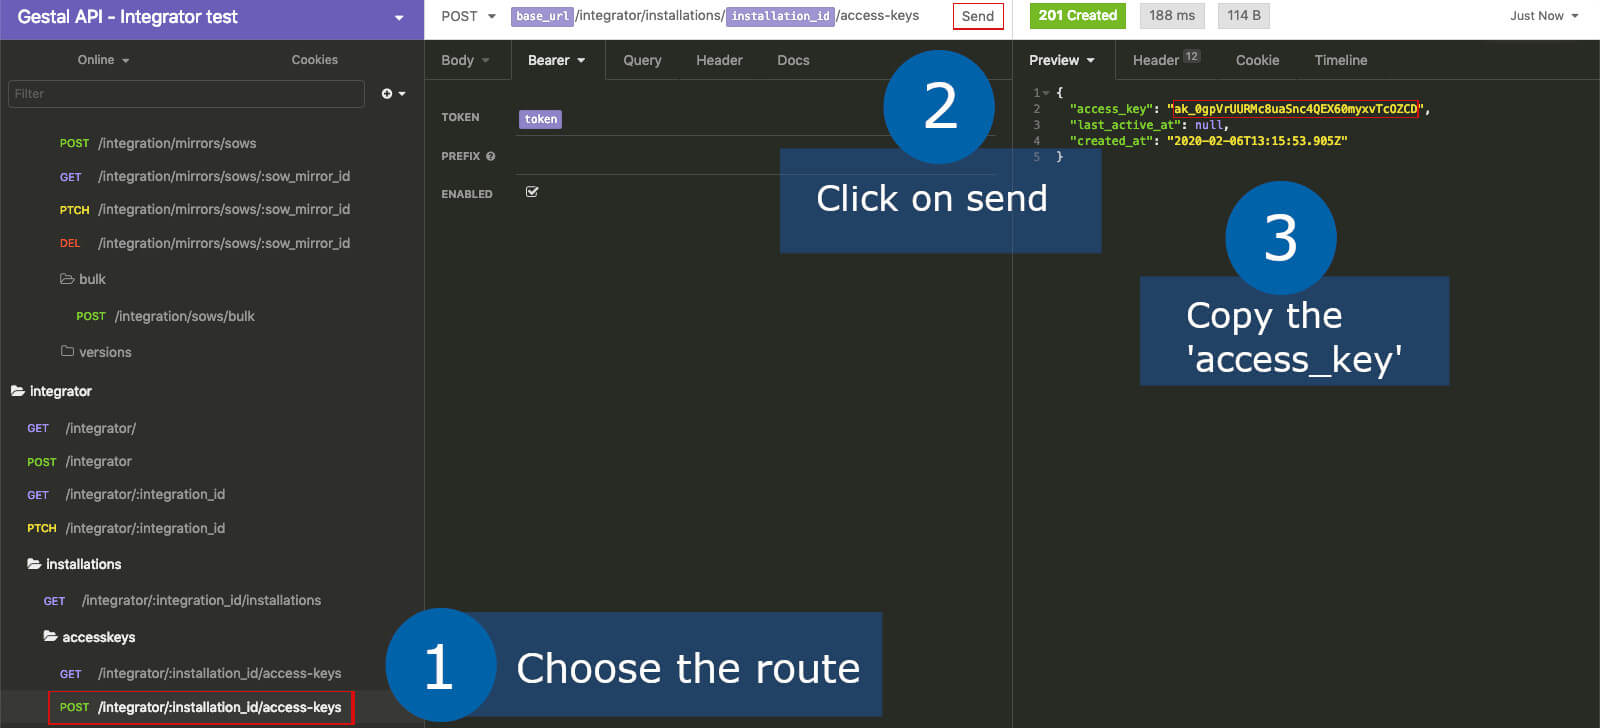
# 8 Create an access key
Finally, click on the "POST /integrator/installations/:installation_id/access-keys" route, which will now use the
installation_id variable in its URL, and click send. A new
access key will be created!
Obfuscation
This is the only time you will see this access_key value, so make sure to store a copy and
save it as the access_key variable.
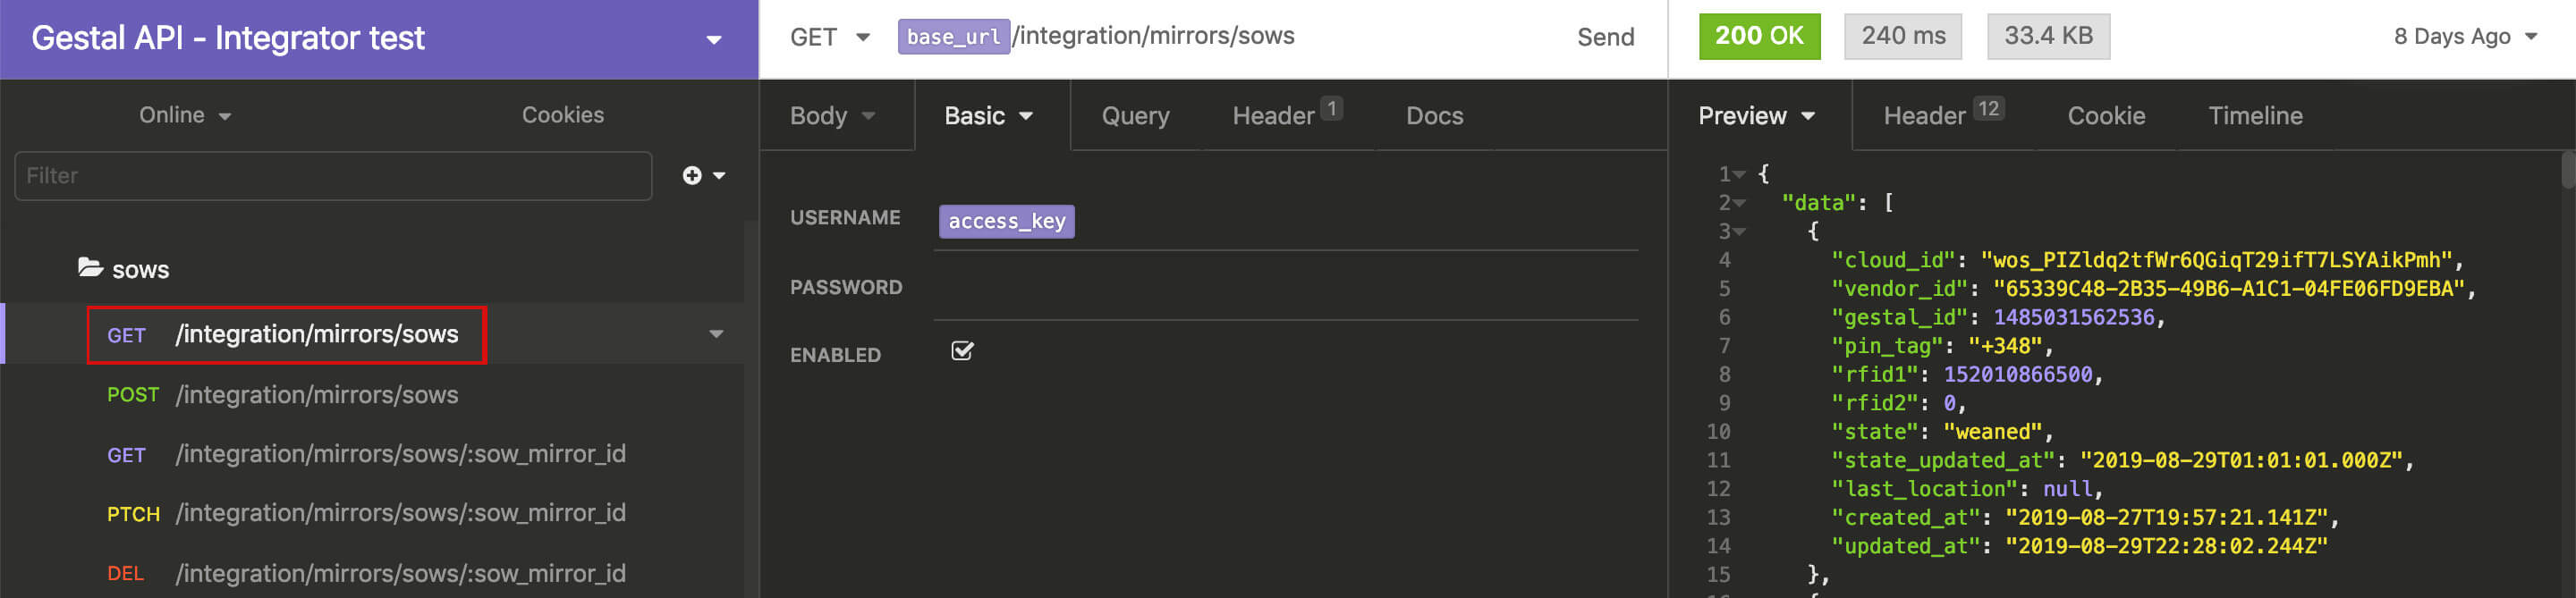
# 9 Access the site's data
Now that you have an access key, you can use it to access site data by providing it as basic authentication.
Discover the various routes under the /integration folder, such as "GET /integration/sows" which will
return all sow mirrors.
← Basics Code examples →